How to flash openMQTTGateway with CC1101 Radio Module is a comprehensive resource for individuals looking to integrate the openMQTTGateway platform with the CC1101 radio module. This guide covers everything from the initial setup of openMQTTGateway to the configuration of the CC1101 radio module, providing step-by-step instructions and troubleshooting tips.
Overview of openMQTTGateway Project
openMQTTGateway is a significant project aimed at creating a single firmware that can read data from BLE, LoRa, RF, GSM, GPRS, and infrared devices and then publish them via MQTT with radios like CC1101. The project is designed to provide a unified solution for integrating various types of devices and transmitting their data through MQTT and so that making it a versatile and valuable tool for IoT applications. The openMQTTGateway project offers a wide range of functionalities and capabilities therefore making it a popular choice for developers and enthusiasts working on IoT projects.
Discovering this project through Andreas Spiess’s (known as the guy with the Swiss accent) video intrigued me and finally prompting me to delve into it. However, my experience didn’t mirror the smooth execution depicted in the video so unfortunately, it took me nearly two days of troubleshooting to get it up and running. Consequently, I’ve crafted this guide for those interested in setting up a bare ESP-12-based openMQTTGateway utilizing the CC1101 radio module.
Materials Required for openMQTTGateway
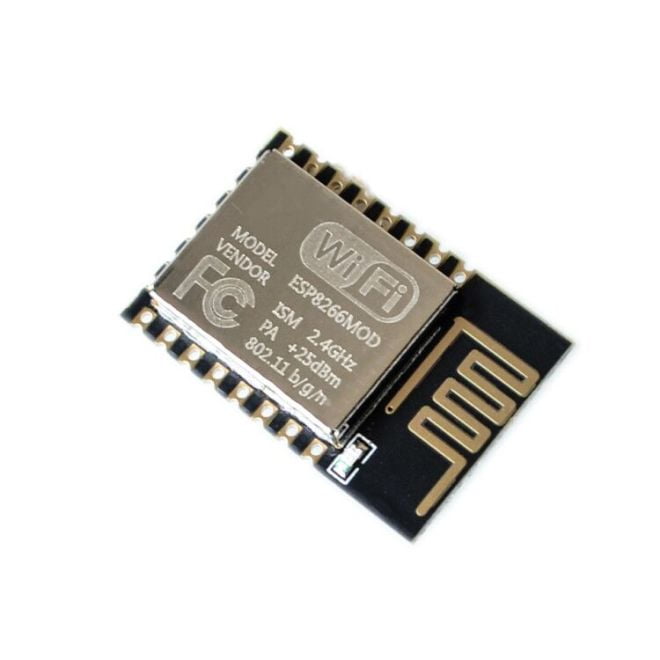
ESP8266 (I used an ESP-12)

ESP8266 Development Board

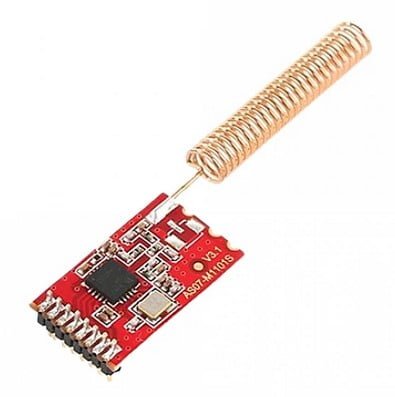
CC1101 module

Wiring Configuration for CC1101 Module
After encountering issues with the CC1101 wiring configurations recommended on the openMQTTGateway site and LSatan’s wiring, I decided to devise my own setup. I highly recommend following this wiring guide as I found that even after tweaking the code, the radio failed to function with different GPIO configurations due to the ESP-12 pins’ states.
| CC1101 | ESP-12 |
|---|---|
| VCC | VCC (3.3 V) |
| GRD | GRD |
| GDO2 (Receiver) | GPIO4 |
| GDO1 (MISO) | GPIO12 |
| MOSI | GPIO13 |
| SCK | GPIO14 |
| CSN | GPIO15 |
| GDO0 (Emmiter) | GPIO2 |
Code Modifications for CC1101 Utilization
The openMQTTGateway website provides three convenient options for uploading the code: via the web, ready-to-go binaries, or by configuring your own setup. While I successfully flashed the chip using the first two methods, I encountered difficulties with the nodemcuv2-rf-cc1101, nodemcuv2-rf2-cc1101, and nodemcuv2-somfy-cc1101 firmwares. Specifically, these firmwares failed to establish the expected WiFi access point, only generating a network with the chip’s name (such as ESP12F), which couldn’t be connected to. This issue wasn’t present with other nodemcu firmwares, which consistently created a WiFi access point named “OpenMQTTGateway.” Consequently, I opted for the third method, configuring my own setup, to address this problem effectively.
To facilitate this process and avoid potential library and compatibility issues, I recommend utilizing PlatformIO as your development environment. To get started:
- Install PlatformIO: Begin by installing PlatformIO, a cross-platform IDE for embedded development, by following the installation instructions provided on their website.
- Then, open VSCode Extension Manager
- Later, search for official PlatformIO IDE extension
- Following this, install PlatformIO IDE.
- Download openMQTTGateway: Install openMQTTGateway by following the installation instructions provided on their website.
- Finally, unzip the file and open folder from the Visual Studio Code.
Changes in User_config.h to enable CC1101
- First, uncomment line //#define ZradioCC1101 “CC1101” (This enables CC1101 radio)
- If you experience wifi access point problems, in this situation, you’ll have to manually enter your wifi credentials;
- Start with uncommenting line //# define ESPWifiManualSetup true
- Then, enter your SSID in line # define wifi_ssid “YOUR SSID HERE”
- Finally, enter your WIFI password in line # define wifi_password “YOUR WIFI PASSWORD HERE”
- If you want to define static IP for your gateway;
- First, uncomment line //#define NetworkAdvancedSetup true
- Then, enter the IP address for your gateway; const byte ip[] = {XXX, XXX, XXX, XXX};
- Later, enter the IP adress of your modem; const byte gateway[] = {XXX, XXX, XXX, XXX};
- Following this, enter DNS; const byte Dns[] = {XXX, XXX, XXX, XXX};
- Finally, enter subnetmask; const byte subnet[] = {XXX, XXX, XXX, XXX};
If you want to change your MQTT settings;
- Define IP from this line; # define MQTT_SERVER “XXX.XXX.XXX.XXX”
- Port can be changed from this line; # define MQTT_PORT “1883”
- If you’re using username and password in your MQTT server they can be defined from this lines; # define MQTT_USER “your_username” and # define MQTT_PASS “your_password”
- Base topic of the MQTT can be changed from this line; # define Base_Topic “home/”
Base topic is important when sending commands to the radio, so if you change it, you’ll have to send your commands to this new base topic.
That’s all the changes I’ve made in User_config.h
Changes in environments.ini
- Find line [env:nodemcuv2-rf-cc1101]
- A few lines below there should a line such as; ‘-DGateway_Name=”OpenMQTTGateway_ESP8266_RF-CC1101″‘
- Finally, add this 2 lines below;
'-DRF_RECEIVER_GPIO=4'
'-DRF_EMITTER_GPIO=2'
These will define our receiver and emitter pins. So, if you made a different wiring, you should change the numbers here according to your new setup.
Changes in platformio.ini
- Find and uncomment default_envs = nodemcuv2-rf-cc1101
Flashing
- Connect your development board and check the COM port number. Select the correct port from the Visual Studio Code. Click COM port icon at the bottom status bar and select the port from the menu.
- Then, create a new terminal window using the top menu Terminal->New Terminal
- Enter command platformio.exe run –target erase (This will erase the ESP12 chip)
- Finally, click -> icon at the bottom status bar and wait for the upload to finish.
If all goes well, you should now have a working openMQTTGateway.
Testing
- There is a great tool called MQTT Explorer coded by Thomas Nordquist which I use to listen and send commands to my MQTT server. I strongly recommend it. (http://mqtt-explorer.com/)
- After running MQTT Explorer you’ll have to enter the credentials of your MQTT server and press connect.
- If your gateway is operational you should see two new topics; one is the base topic (default is home) and the other one is homeassistant.
- If there are 433mhz devices around you, you can monitor their signals data under your base topic/OpenMQTTGateway_ESP8266_RF-CC1101/433toMQTT topic and also under homeassistant/device_automation topics.
- To send radio signals, you should use this syntax as topic; your base topic/OpenMQTTGateway_ESP8266_RF-CC1101/commands/MQTTto433. For example if your base topic is “home” and you want to send a value like “123456” the correct topic should be “home/OpenMQTTGateway_ESP8266_RF-CC1101/commands/MQTTto433”. You may enter it to MQTT Explorer like this and click publish to transfer it:
- Rest is all about the settings you will make on your controller (like openHAB or Home Assistant).
I hope this guide will help you.
I want to thank all the folks on OpenMQTTGateway project for this piece of great code. Nice work guys…
